
If you want to learn how to regrip golf clubs at home, this tutorial guide will show you how to do this by yourself! Most stores will provide this service for free or cheap if you buy some new golf grips from them, but it is possible to install new grips yourself as well.
If you have any more questions, comment below and let me know!
Preparing to Regrip Your Golf Clubs
Before you begin regripping your golf clubs at home, it’s essential to set up correctly to ensure safety, efficiency, and a quality result. Regripping is very straightforward, but preparation is key to a smooth experience.
Required Tools and Materials
To grip your golf clubs at home, you will need the following items:
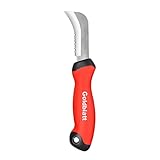
- Hook Blade Knife: Used to safely cut and remove old grips without damaging the shaft. You can also use a utility knife if you don’t have a hook blade knife accessible.
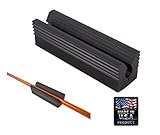
- Rubber Vise Clamp: Holds the club securely while protecting the shaft from damage.
- Double-Sided Grip Tape: This is applied to the end of the shaft to secure the new grip. Don’t use masking tape, get double-sided!
- Grip Solvent: Helps slide the new grip onto the shaft and activates the tape’s double-sided adhesive.
- Fresh Grips: Choose grips that suit your playing style, hand size, and weather preferences.
- Air Compressor: An alternative tool for quickly installing grips, offering convenience but requiring careful handling to ensure proper application and avoid potential issues during installation.

Wedge Guys actually sells a really great kit for regripping your golf clubs that I would recommend. It comes with everything you need:

Here are some other products I’ve used to regrip my golf clubs:


Workspace Setup Instructions
- Choose a Well-Ventilated Area: Grip solvent can have strong fumes, so we recommend working in a garage or outdoor space with good airflow.
- Set up a Sturdy Table: You’ll need a flat, stable surface to use the vise and lay out your materials.
- Secure the Vise: Mount it to the edge of the workbench or table and ensure it doesn’t move during use.
- Attach Rubber Clamps to the Vise: These protect your club’s shaft (especially graphite shafts) from being crushed or scratched during removal and installation.
- Organize Your Tools: Place the hook blade, tape, solvent, and grips nearby for quick and easy access.
- Lay Down Protective Materials: An old towel or a drip tray to catch excess solvent will be handy to keep your workplace clean.
- Cleaning Materials: Have some paper towels or rags available for cleaning up any spills and wiping down the club shafts. Ensure you have materials to remove extra solvent to achieve a clean finish on the grips.
Now you are ready to regrip golf clubs! The whole process will take about an hour if you have some experience and longer if you don’t.
How to Remove Old Golf Club Grips Safely

Removing old grips is the first step in the regripping process. Using a hook blade knife makes this task safer and more efficient, especially when dealing with graphite shafts. Follow these steps to remove old grips cleanly and safely:
Make sure that you are cautious during the removal process to avoid making an error because mistakes will give you extra work to do. Or even worse, you’ll need professional help to finish.
- Secure the Club in a Vise: Use rubber clamps to protect the club shaft in your vise. Position the club so the grip is easily accessible and the face of the club is upright.
- Position the Hook Blade: Hold the blade knife so the curved edge faces the shaft. Start at the open end of the grip (near the butt end of the club).
- Make a Controlled Cut: Gently insert the hook under the grip’s surface. Apply light pressure as you pull the blade lengthwise along the grip, cutting away from your body and the shaft.
- Peel Off the Grip: Peel the grip away from the shaft once the grip is sliced open.
- Remove Old Tape Residue: Peel off the old grip tape after the grip is off. Use a grip solvent or adhesive remover and a rag to clean any remaining residue from the shaft.


How to Clean and Prepare Golf Club Shafts
Once the old grips are removed, you need to clean and prepare the club shafts to ensure optimal adhesion for the new grips. Proper cleaning ensures a secure fit and longer-lasting performance.
Removing Old Tape and Adhesive Residue
- Peel Off Remaining Tape: Start by manually peeling away any remaining grip tape. A utility scraper or plastic putty knife can help lift stubborn sections without scratching the shaft.
- Apply Solvent: Use a grip solvent or adhesive remover to break down sticky residue. Soak a cloth with the solvent and rub it over the tape-covered areas. Let it sit for a minute, then wipe it clean. Use a finger to cover the opening of the grip to prevent solvent from leaking out.
Using a Heat Gun or Hair Dryer (for Stubborn Grips)
- Apply Gentle Heat: If the old adhesive is particularly tough, apply a heat gun or hair dryer on a low to medium setting. Keep the tool 6–8 inches from the shaft and move it continuously to avoid overheating.
- Remove Softened Tape: As the adhesive softens, use a cloth or scraper to remove it gently. Avoid overheating graphite shafts, as excessive heat can damage the material.
Final Shaft Cleaning
- Wipe Down the Shaft: Once all residue is gone, thoroughly wipe the shaft with a clean cloth and a final solvent splash to remove any remaining oil or debris.
- Let Dry Completely: Allow the shaft to air dry for several minutes before applying new tape or grips. A clean, dry surface is essential for regripping golf clubs.

How to Apply New Golf Grip Tape

Applying grip tape correctly is essential for a secure grip installation. Proper tape placement ensures the grip slides on easily and adheres well.
Measuring and Cutting the Tape
- Measure the Tape Length: Use the new golf grip as a guide. Cut a strip of double-sided tape about the same length as the grip. Double-sided tape is crucial for ensuring a smooth and secure fit for the grips, especially when dealing with varying shaft sizes and materials.
- Optional Overhang: You can allow an extra inch to fold over the butt end of the shaft. This helps prevent moisture from getting under the grip and creates a smooth seal.

Wrapping the Tape Without Bubbles or Wrinkles
- Peel and Apply: Peel the backing off one side of the tape and carefully apply it lengthwise to the shaft. Start from just below the butt end and press it down evenly.
- Smooth as You Go: Use your fingers to press out air bubbles or wrinkles as you wrap the tape around the shaft.
Aligning and Overlapping the Tape
- Wrap Tightly and Evenly: Wrap the tape once around the shaft, slightly overlapping the edges if you use spiral-wrapping tape instead of precut strips. Make sure to avoid excessive overlap, which can cause lumps.
- Seal the End: Fold any excess tape over the end of the shaft. This creates a rounded cap under the grip and helps secure the top during installation.

How to Regrip Golf Clubs & Install New Grips
Installing new grips is the final and most satisfying step if you want to regrip golf clubs. Using grip solvent allows the grip to slide smoothly into place over the tape and ensures a secure bond once it dries.
Step-by-Step Grip Installation Process
- Apply Solvent to the Tape: Pour grip solvent generously over the grip tape, ensuring the entire surface is saturated. Hold the club over a catch tray to collect any excess solvent.
- Coat the Inside of the Grip: Pour some solvent into the grip, cover the open ends with two fingers, and shake it to coat the interior thoroughly. Pour the remaining solvent over the tape.
- Slide the Grip Onto the Shaft: Quickly and firmly push the grip onto the shaft in one smooth motion. Do not twist or stop midway, as this can wrinkle the tape or misalign the grip.
- Wipe Off Excess Solvent: Use a towel to wipe off any excess solvent from the grip and shaft. This ensures that no residue is left before allowing the clubs to dry.

Technique for Proper Grip Alignment
- Check the Logo and Orientation: With the grip fully seated, rotate it as needed to align the logo and any markings with the clubface. Most golfers position the logo square with the clubface.
- Fine-Tune Within Seconds: You have a brief window (usually under a minute) to adjust alignment before the solvent begins to set. Look down the shaft to ensure the grip is straight and symmetrical.
- Let It Dry: Allow the club to sit horizontally for at least 2–4 hours (or overnight) to let the solvent dry thoroughly before use.
Conclusion
Regripping your golf clubs at home is a rewarding DIY project that can save you money while ensuring your equipment performs at its best. With the right tools and careful attention to detail, you can maintain your clubs like a professional.
Remember, well-maintained grips are crucial for consistent play and better scores on the course. Don’t let wHow often should I regrip my golf clubs?orn grips hold back your game!
Frequently Asked Questions About Golf Club Regripping (FAQs)
How often should I regrip my golf clubs?
Golf clubs should typically be regripped every 40 rounds or once per year, whichever comes first. More frequent replacement may be needed for practice clubs or in humid climates.
Can I regrip golf clubs without a rubber vise clamp?
Yes, you can regrip clubs without a vise clamp by carefully securing the club between your feet, though using a vise is recommended for better results and safety.
How long does it take for new golf grips to dry?
New grips typically need 24 hours to fully cure and dry thoroughly. Playing before fully dry can cause grip slippage or misalignment.
Can I reuse old grip tape?
No, old grip tape should never be reused, as it will not provide proper adhesion. Always use fresh double-sided grip tape for each new grip installation. The only reason for needing additional adhesive tape is to prevent tearing at the end of the shaft.
How much does it cost to regrip a complete set of golf clubs?
DIY regripping costs about $75-100 for a complete set, including materials, compared to $150-200 at a pro shop.
Last update on 2026-03-13 / Affiliate links / Images from Amazon Product Advertising API