Shave some serious strokes off of your golf game with these practical putting tips! Learn how to drain putts consistently on the golf course and putt better.
Below, I cover everything from:
Basic putting fundamentals you need to know
The different putting grip styles
Drills to practice putting better
and more!
If you have any extra tips on how to putt better, make sure you comment and let us know your tricks!
Why Putting Matters in Golf
One of the main reasons why putting matters so much in golf is its direct impact on stroke efficiency. Putting accounts for a significant portion of a player’s strokes during a round of golf.
Therefore, improving putting skills can significantly reduce the number of strokes taken, leading to a more efficient game and, ultimately, a lower score.
Putting is also a true test of a golfer’s mental focus. Staying calm, focused, and confident while standing over a crucial putt separates great golfers. Putting also plays a pivotal role in building confidence on the golf course.
A golfer consistently sinking putts boosts their self-belief and gives them a sense of control over their game. This confidence then carries over to other aspects of their game, such as driving and iron shots.
Dedicating time and effort to improve your putting stroke will undoubtedly pay dividends in your overall performance and enjoyment of golf. The PGA tour keeps track of several putting stats because of how important it is to your golf game.

Putting Resources
Before I get into the fundamentals of putting and how to putt better today, I want to showcase other putting resources here at Hitting the Golf Ball. After you are done reading this article, come back here and check out some of these:
- Best putters you can buy today.
- Best putting aids to improve your game.
- What putters do PGA players use?
- Blade vs mallet putters: Which style is better?
- Best indoor putting greens for your house.
Fundamentals of Putting
No matter if you want to drain long or short putts more consistently, there are some basic things you need to know.
Starting the Ball on the Right Putting Line
To start the golf ball on the right line when trying to make a good putt, there are several key steps to follow:
Stand behind the golf ball and visualize the line you want the ball to roll on towards the hole. Use a line on the ball or an alignment tool to help you aim correctly.
Position your feet, hips, and shoulders parallel to the intended start line of the putt. This will help you set your stroke in the right direction.
Hold the putter with a light grip and ensure your hands are positioned comfortably on the putter handle. This will help you maintain control and feel throughout the stroke.
Keep your head still and your body relaxed. This will help you maintain balance and stability during the stroke.
Use a pendulum-like motion with your arms and shoulders to swing the putter back and forth along the intended line. Maintain a smooth and consistent tempo during your practice strokes.
Following all these steps, you can start your putt on a straight line towards your intended target.
Reading the Green Accurately
To read greens accurately in golf, you should start by understanding how greens are built for drainage and studying the area around the putt’s line. Additionally, you can improve your green reading abilities by reading from behind the hole for downhill puts and on the way up for uphill putts.
I recommend sectionizing the putt and considering the break needed for longer putts. This helps break the putt up into different sections and should also help with your distance control.
Most new golfers play too much break in their putts. On longer greens, the golf ball almost never breaks as much as it looks.

Putting Posture and Setup Essentials
Body Alignment
Good alignment is essential for accurate putting. The putter face should be square to the target line, and the feet, hips, and shoulders parallel to the target line.
Many players practice using alignment aids, such as alignment sticks or markings on the putter, to ensure proper alignment to your target.
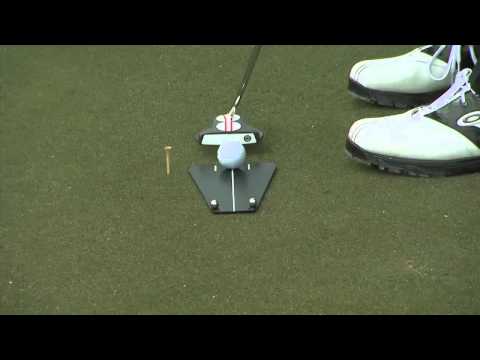
Grip Techniques
Your grip plays a fundamental role in your putting stroke because it influences the club face angle and helps you start the ball on the intended target line. The grip connects your body movements to the club face, particularly your putting stroke.
There are different grip techniques in putting that golfers can utilize:
The conventional grip is where the hands are placed together on the putting grip, with the palms facing each other.
The cross-handed grip is where the lead hand is placed below the trail hand on the putting grip. This grip can help promote a more stable and consistent stroke and balance your shoulders.
The claw grip is another popular technique, where the trail hand is placed in a claw-like position, providing more control and stability.
Your grip comes down to personal preference and comfortability on the golf course. I always recommend trying different grips on the practice green beforehand to see if something feels better.
Eyes, Hands, and Legs
Your eyes, hands, and legs are crucial for a successful putt. Positioning your eyes over the golf ball and down the target line is essential for proper alignment and ensuring that you aim at your target accurately.
Letting your arms hang down relaxed with the hand below the shoulders allows for a natural and smooth stroke. This helps maintain control and stability throughout the putting motion with a smooth pendulum-type motion.
Your legs also play a role in maintaining balance and stability during your putting stroke. Keeping a solid base with your legs helps you maintain control and execute a consistent stroke.
Selecting the Right Putter
Selecting the right putter in golf is of utmost importance as it directly impacts a player’s putting performance and overall score on the course.
The hosel plays a significant role in determining the amount of toe hang a putter produces. Different hosel types, such as single bend and flow neck hosels, offer varying levels of toe hang, which can influence a player’s putting motion and stroke.
If you have a more structured putting motion, you may prefer face-balanced putters with single bend hosels, while those with an arced stroke might benefit from flow neck hosels with more toe hang.
Another important thing about choosing a good putter is choosing between a mallet head and a blade head. Most golfers stick with what they know, but I always recommend trying both to see which fits your putting stroke.
Fundamental Putting Mechanics
All great putters follow very similar fundamentals.
Educating Your Wrists for a Perfect Stroke
When putting in golf, the wrists are crucial for the perfect stroke. Educating your wrists can help you develop a smooth and consistent putting motion, resulting in improved accuracy and distance control.
Here are a few tips to educate your wrists for a perfect putting stroke:
Grip Pressure: Start by ensuring a light grip pressure on the putter. A tight grip can restrict the natural movement of your wrists and make it difficult to control the putter’s face. Maintain a relaxed grip, allowing your wrists to move naturally during the stroke.
Flat Left Wrist (for right-handed golfers): Keep your left wrist flat and firm throughout the putting stroke. This position helps maintain the putter face’s proper alignment and promotes a square impact with the ball. Avoid any excessive bending or cupping of the left wrist.
Controlled Backswing: During the backswing, focus on maintaining a controlled and smooth movement of your wrists. Avoid any sudden or jerky motions that can lead to inconsistency in your stroke. Practice a consistent rhythm and tempo, allowing your wrists to hinge naturally.
Lag and Release: As you transition from the backswing to the forward stroke, focus on creating a lag between your wrists and the putter head. This lag generates power and control. Just before impact, release the lag, allowing your wrists to unhinge naturally and accelerate through the ball.
Follow-through: After impact, continue the smooth motion of your wrists towards the target. A balanced and extended follow-through helps to ensure a smooth and controlled stroke. Avoid any abrupt stops or flicking movements.
Advanced Putting Strategies
Advanced Pace Control
Deadweight or lag putting involves hitting the ball relatively slowly to get it close to the hole without risking overshooting.
Pro-level putting aims to sink putts into the hole with a more precise and faster stroke. This requires reading the slope and speed of the green, a consistent putting stroke, and a good sense of distance control.
Most high handicappers should focus more on lag putting than pro-level putting. Instead of trying to make long putts, it is essential to try and get your first putt close so that you have a shorter second putt.
Pace Control Drills for Intermediate and Advanced Golfers
Pace control is an essential aspect of putting in golf, and it can often make the difference between sinking a putt and leaving it short or racing it past the hole.
Here are a few effective putting drills you can incorporate into your practice routine:
The Lag Putt Drill: Find a long, uphill putt on the practice green, preferably around 30-40 feet. The objective here is to lag the ball close to the hole without attempting to sink it. Focus on getting a good feel for the distance and consistently leaving yourself an easy tap-in for the next putt. This drill hones your ability to control the speed of the ball on longer putts.
Downhill Distance Control: Find a downhill breaking putt and practice rolling the ball down to the hole, focusing on controlling its speed and break. This drill helps you develop a delicate touch and the ability to read and adjust to downhill putts effectively.
The Gate Drill: Set up two tees slightly wider than your putter’s head on a flat, straight putt. The tees should form a “gate” just wider than the ball. Practice hitting putts through the gate, ensuring your ball rolls smoothly and stays on target. This drill enhances your accuracy and helps you maintain a consistent stroke.
Different Putting Styles
There used to be only one way that golfers gripped their putter. Nowadays, there are several innovative putting styles that golfers have adopted to improve their performance on the golf course.
Below are a few notable putting styles now being used:
Claw Grip: The claw grip involves a unique position where the trail hand (usually the right hand for right-handed golfers) is claw-like on the putter grip. The lead hand (usually the left) is placed in a more traditional grip. This style helps to stabilize the wrists and promotes a more consistent stroke.
Armlock Putting: Armlock putting is a technique where the putter grip is pressed against the lead forearm, effectively locking the putter in place. This style helps to minimize wrist movement and promotes a more pendulum-like stroke. Specific grips are needed for this putting.
Cross-Handed Grip: Also known as the left-hand low grip (for right-handed golfers), the cross-handed grip involves placing the lead hand below the trail hand on the putter grip. This style helps to eliminate excessive hand and wrist movement, promoting a smoother stroke.
Face-On or “Side-Saddle” Putting: This unconventional style involves standing perpendicular to the target line with the feet together and the shoulders squared to the target. The player swings the putter directly back and forth along the target line, using a face-on or side-saddle stance. This style can help minimize the putter face’s unwanted rotation during the stroke.
Finding a comfortable putting style that allows for consistent stroke mechanics is essential, as this makes all the difference on the greens.

How to Putt Perfectly (Step by Step)
Approaching the Green with Confidence
Approaching the green with confidence is crucial in putting because it allows you to trust your abilities and make better decisions. When you have confidence, you are less likely to over-analyze or second-guess yourself, especially under pressure.
If you don’t have confidence in making the putt you are lining up for, you may try to over-compensate, which can ruin the putt.
Marking the Ball, Reading the Line and Aiming Your Putt: Pro Tips
When it comes to marking your golf ball and reading the line before executing your putt, there are a few pro tips to keep in mind. First, use a ball marker to mark your ball for identification purposes and to help your alignment.
Many golfers will either mark their ball with alignment aids or use a marking already on it to help align their putts. I recommend keeping the ball on the ground, having your marker right behind it, and placing your club face behind the ball on top of the marker. This will help ensure your putt is perfectly lined up to the hole.

Putting Drills and Exercises
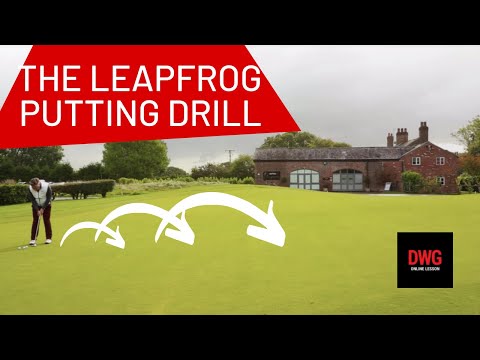
The Leap Frog Drill
The Leap Frog drill is a great exercise to try on the practice green to help improve your distance control when putting. Below is a step-by-step on how to do this:
Place a ball marker on the green about five feet from the hole.
Set up your ball so that it is six inches behind the marker.
Take a moment to read the green and visualize the line you want to putt on.
Predict the outcome of your putt before striking the ball.
Putt the ball towards the marker, trying to stop it within six inches past the marker.
Continue to the next ball marker and repeat the process.
Keep track of how many putts it takes to get to each marker, and try to improve your score each time.
You can adjust the distance between markers and the number of markers to suit your skill level and practice goals.
Remember to focus on speed, accuracy, and visualization to help improve your overall putting skills.
Check out this video for more information:
Circle Drill
The Circle Drill is a great putting exercise in golf, used by many golf greats, including Phil Mickelson.
Gather ten golf balls and a ball marker or tee.
Find a flat area on the putting green or create a circle around the hole using tees or ball markers.
Place the ten golf balls around the hole, forming a circle with equal distances between them.
Stand at the first ball in the circle and address the putt as you usually would.
Focus on your alignment and aim to make the putt into the hole.
Putt the ball and observe the result.
Continue putting the remaining balls in the circle, one by one, focusing on technique and consistency.
Keep track of how many putts you make out of the 10.
Once you consistently make all ten putts in a row, increase the difficulty by moving the circle farther from the hole.
Repeat the drill from different angles and distances to practice different putting scenarios.
Regularly practicing the Circle Drill can improve your putting accuracy and build confidence on the greens.